When working with photographs of products, sometimes the colors are uneven, especially when working with rubber items, such as basketballs. That’s been my project lately, making rubber basketballs look their best.
In learning more and more about blending modes, I discovered a great method using our good ol’ friend the paint bucket mixed with a new layer and blending modes to really even out the colors in a product.
Here’s how I did it:
- Open image in Photoshop
- Save PSD file
- Duplicate original layer
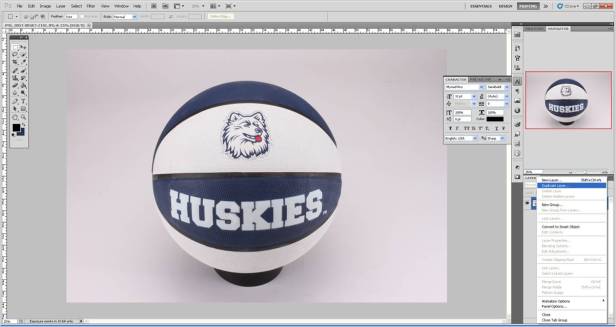
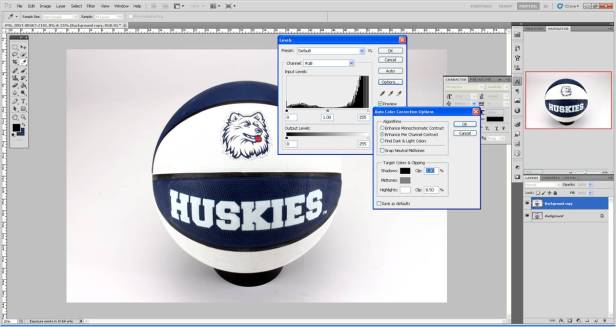
- Adjust color using Image –> Adjustments –> Levels
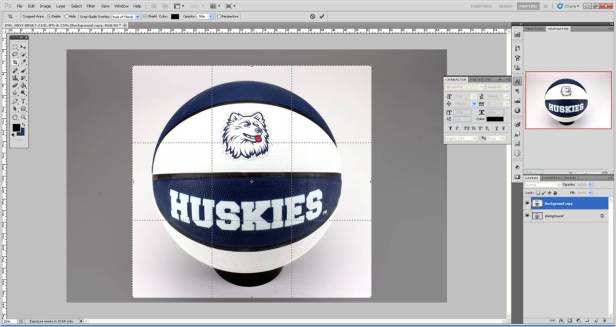
- Crop out unnecessary background
- Select object using the Quick Selection or Pen Tool
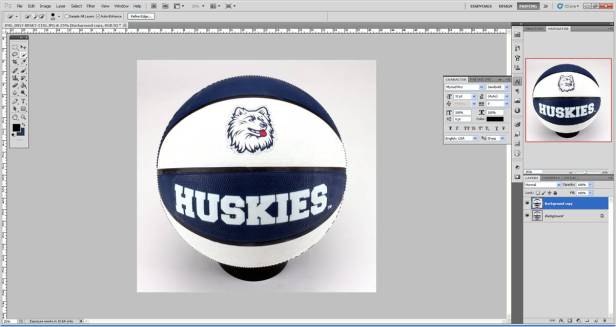
- Hide the background layer then create a Mask to remove balance of background
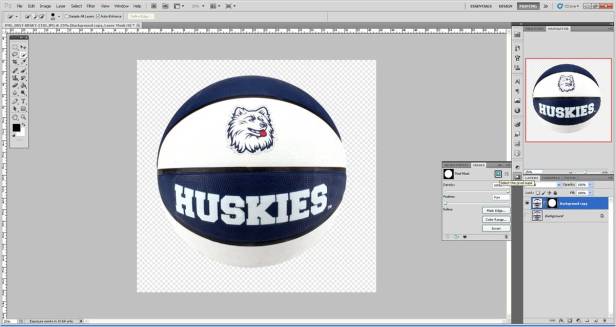
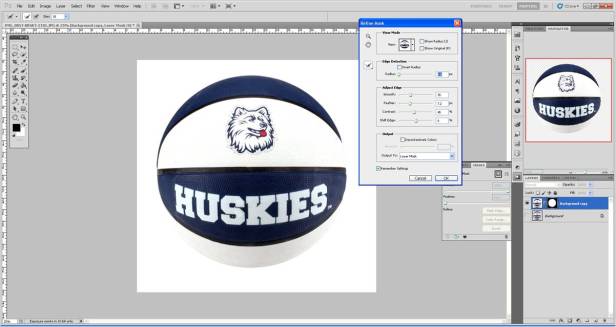
- Refine Mask to smooth the edges
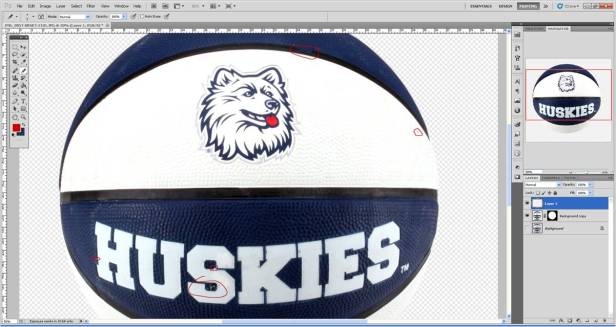
- Make any major cosmetic edits (i.e. uneven lines, folds in the logo) on a new layer. It can be helpful to circle all the flaws so you are sure to fix all of them.
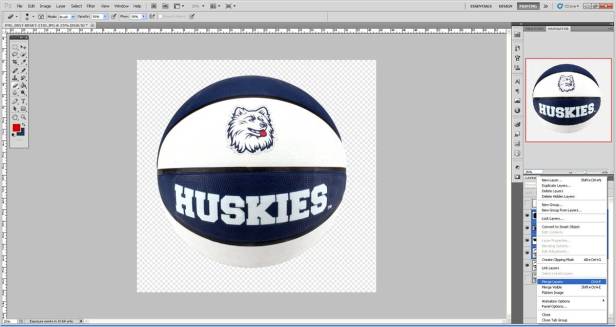
- Duplicate the color edited layer and merge with the editing layers
- Select the first color to even out using Select –> Color Range
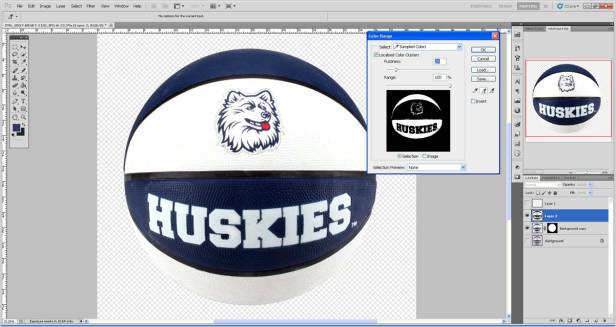
- Adjust the color selection with the Quick Selection Tool
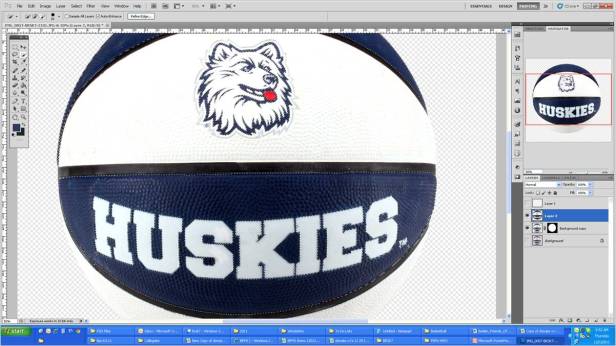
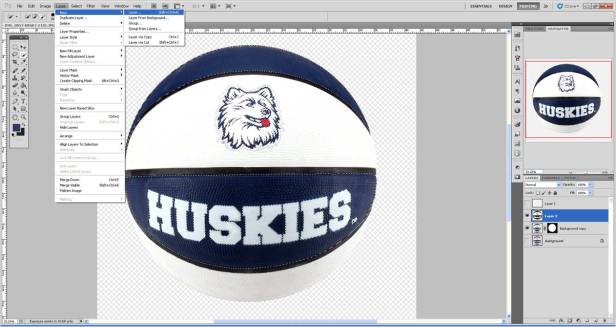
- When color is selected, create a new layer
- Make a Mask of the selection on the new layer (make sure the image is selected, not the mask by clicking on the image on the layer list before moving on to the next step)
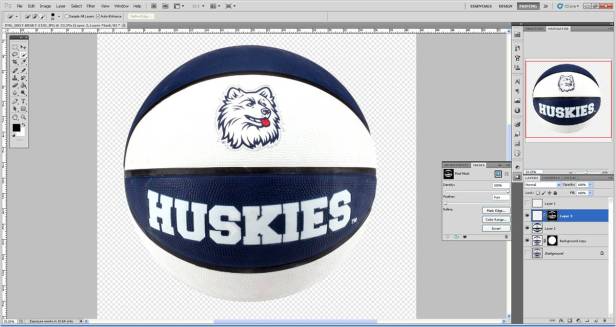
- Using the Paint Bucket Tool, click alt to use the eyedropper to select the correct color (or, if you have a PMS color, select that color from the color library). Click on the image to flood the masked selection with the color
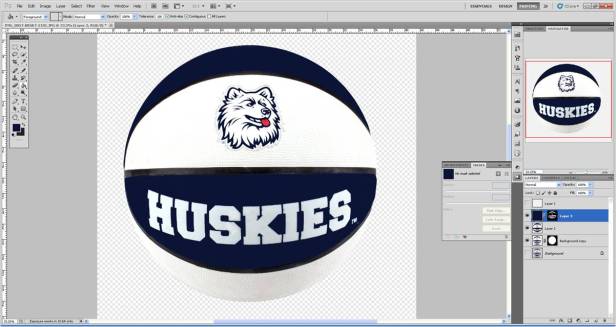
- Select FX –> Blending Options to select a blend mode
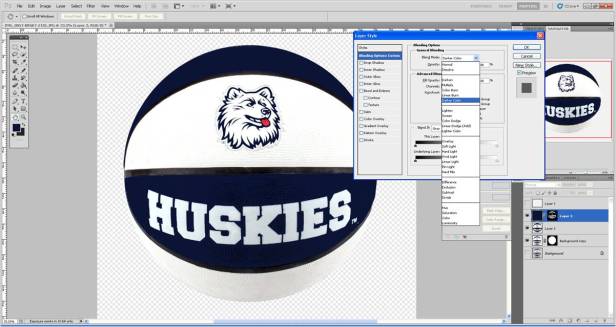
- Review the Blend Modes to see which has the best effect for your image
- Work with the Advanced Blending options until satisfied with the re-coloring
- Repeat from step 11 for the balance of colors if needed
- Review for additional cosmetic editing required
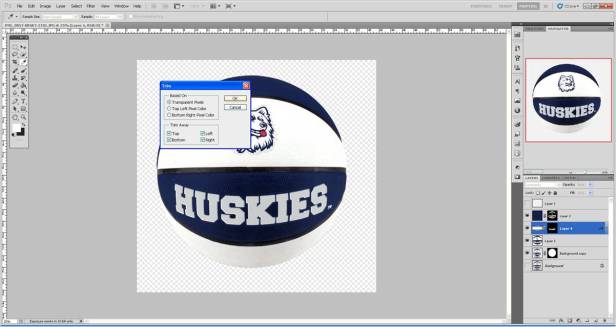
- Trim to desired size
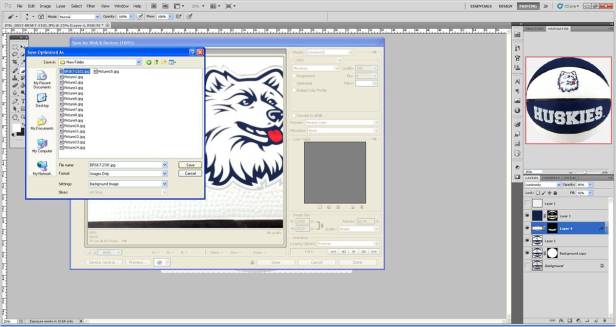
- Save for Web & Devices
Check out the difference between the original photo and the edited image!

NOTE: When working with multiple color adjusting layers, it is helpful to name them specifically, i.e. Red Layer, Blue Layer
Was this helpful to you? Let me know how you have used blending modes in Photoshop!

Howdy! This post couldn’t be written much better! Reading through this article reminds me of my previous roommate!
He always kept preaching about this. I am going to forward this
article to him. Fairly certain he’s going
to have a great read. Many thanks for sharing!
LikeLike
Hello There. I found your weblog using msn. That is a really neatly
written article. I will be sure to bookmark it and return to read
extra of your helpful info. Thank you for the post. I’ll definitely comeback.
LikeLike
Hi! Someone in my Myspace group shared this website with us so I came to give it a look.
I’m definitely loving the information. I’m bookmarking and will
be tweeting this to my followers! Superb blog and great design.
LikeLike
Hi there, I wish for to subscribe for this web site to take hottest updates, so where can i do it please help out.
LikeLike
It’s going to be ending of mine day, but before finish I am reading this wonderful post to improve my know-how.
LikeLike